你们会利用ps制作出风吹立体感文字字体吗?若是不知,就和小编一起去下文好好学习下ps制作出风吹立体感文字字体的教程。
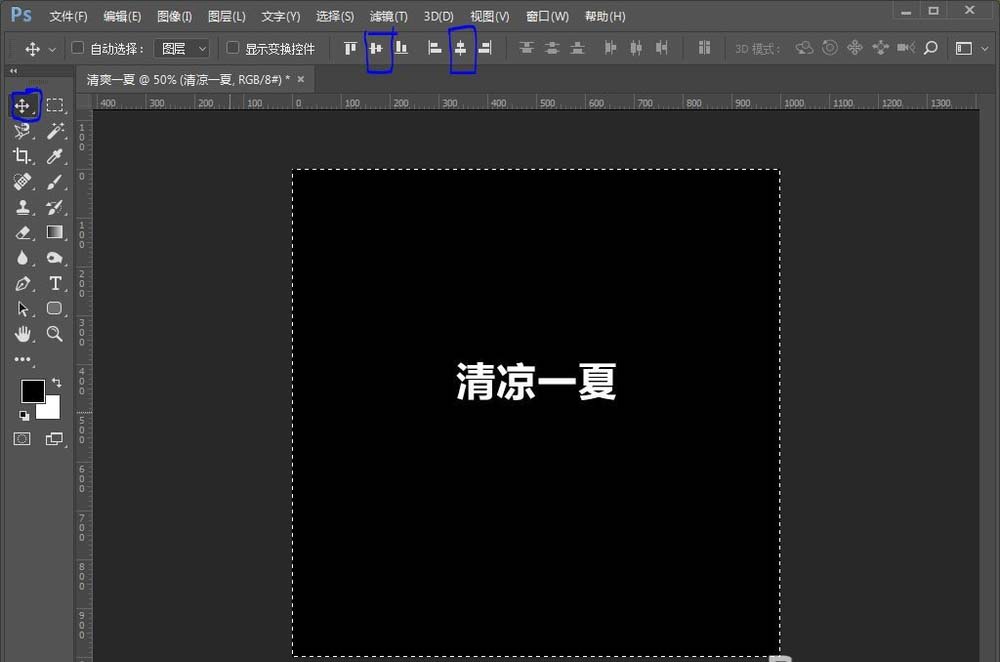
1、新建画板 大小宽和高各为1000px,背景色填充为黑色

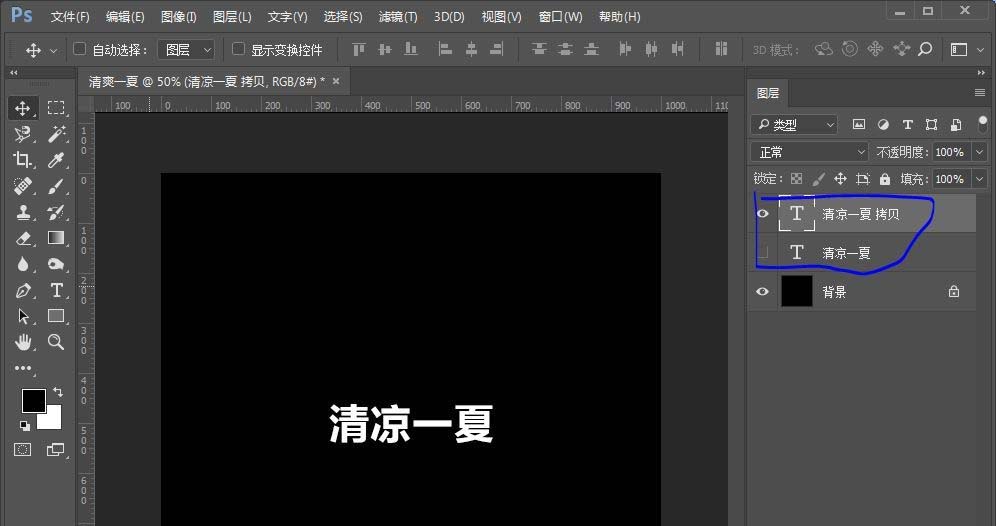
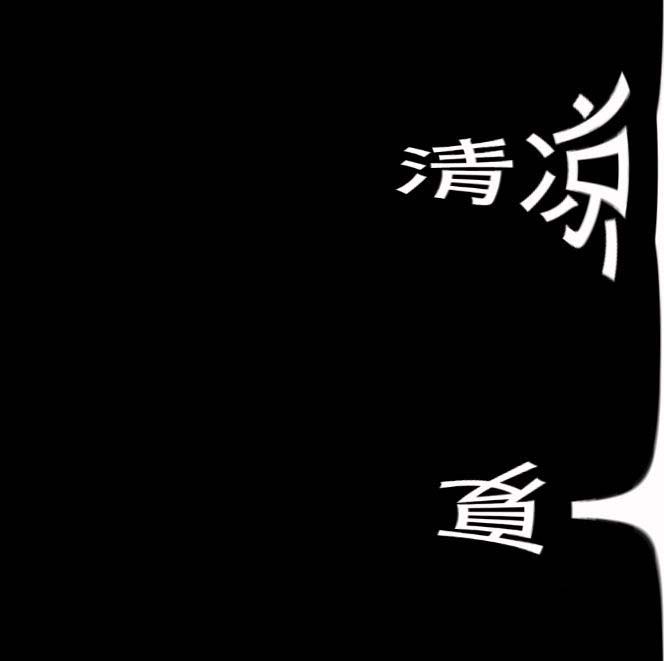
2、输入文字“清凉一夏”,字体,大小适中,在画布中居中,复制图层 保护原图,将复制的新的图层右键删格化文字
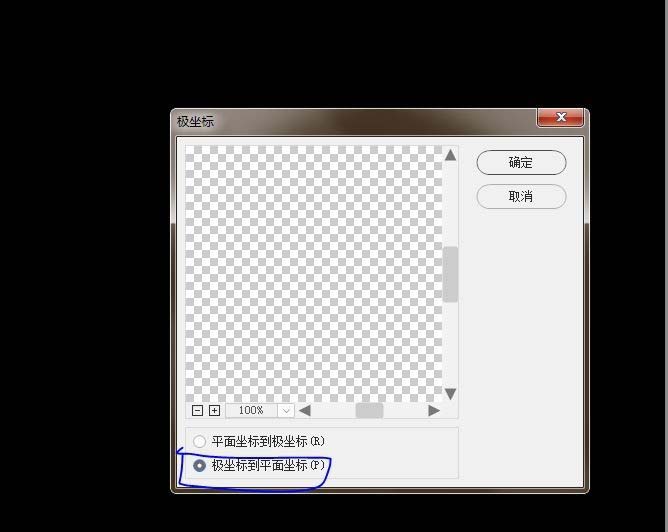
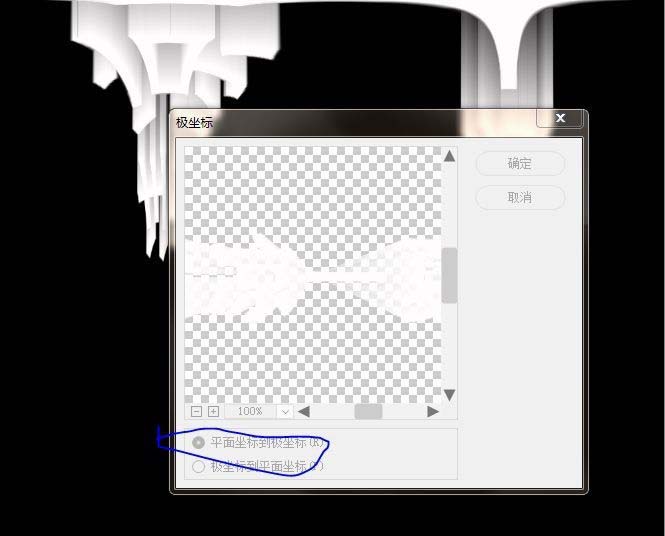
3、打开滤镜-扭曲-极坐标-选择“极坐标到平面坐标”,设置如下
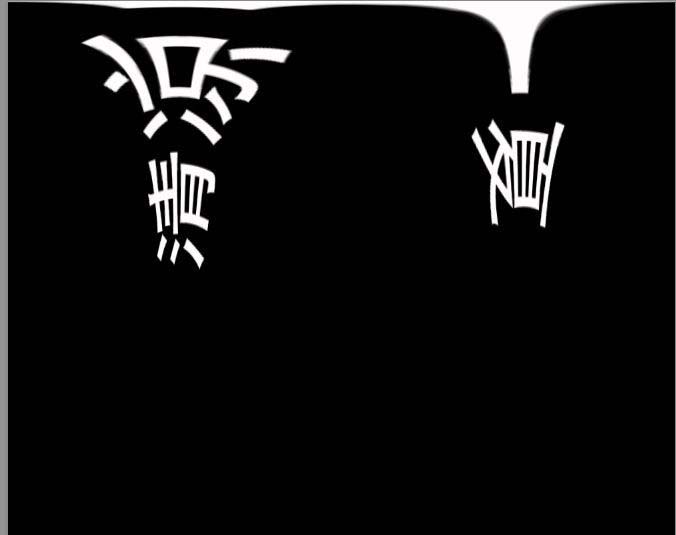
4、然后打开-图像-选择 图像旋转-顺时针旋转90度,效果如图
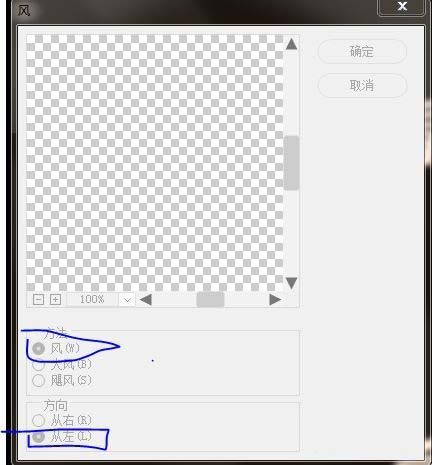
5、然后在滤镜菜单栏中--风格化--风-- 方法选择“风”,方向“从左”
6、继续加左向风,快捷键alt+ctrl+f ,直至填充无缝隙为止,效果如图所示
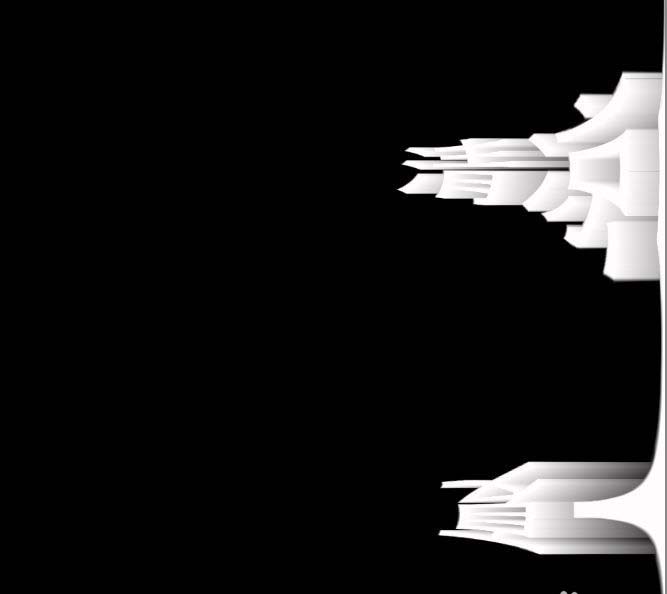
7、之后在图像菜单中选择-旋转--逆时针90度,
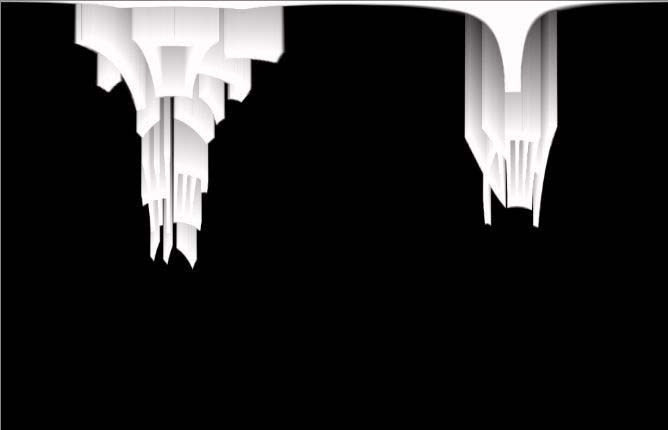
8、滤镜-扭曲--极坐标--选择“平面坐标到极坐标” 确定
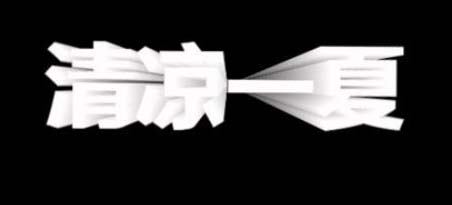
9、最后效果如下
上文就是小编带来的ps制作出风吹立体感文字字体的教程,你们都学会了吗?


")
")


语音转文字!新媒体翻译者都有哪些实时语音转文本工具?")