

想要为视频去色,你们知道使用EDIUS软件是怎么操作的吗?下面教程就为你们带来了EDIUS为视频去色的具体操作流程。

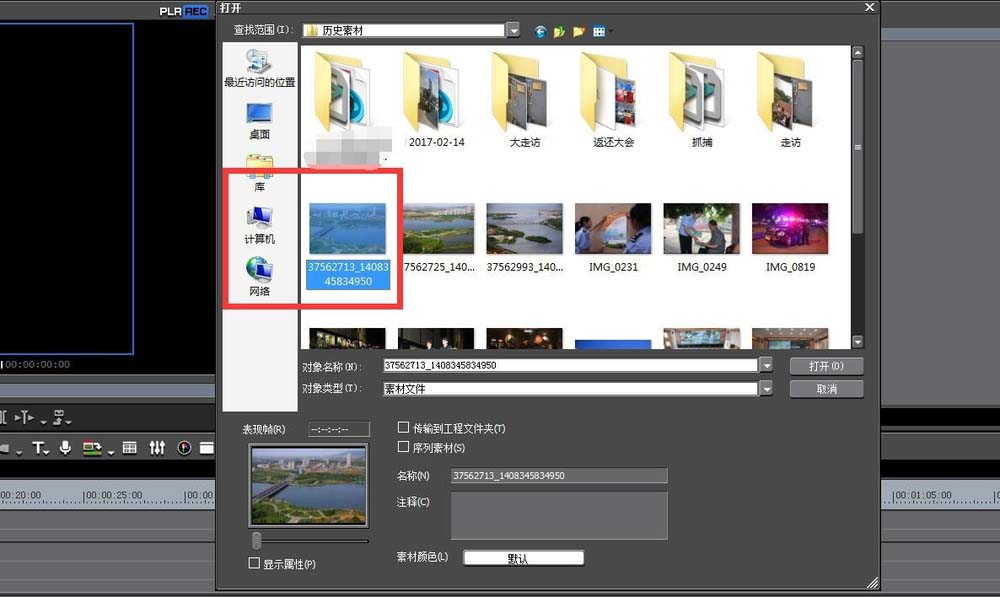
我们首先打开EDIUS软件,然后导入我们要进行效果制作的图片或者视频

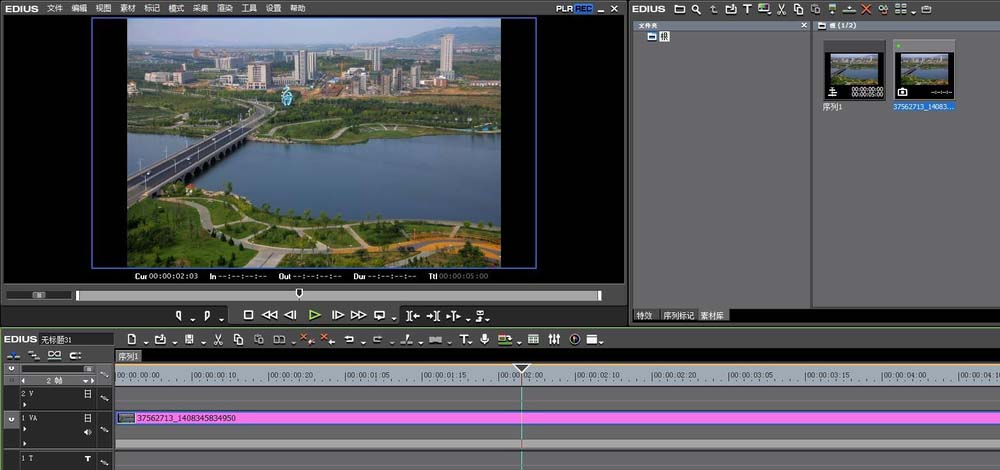
接着将素材导入到时间线上,可以用拖拽的方式进行导入。
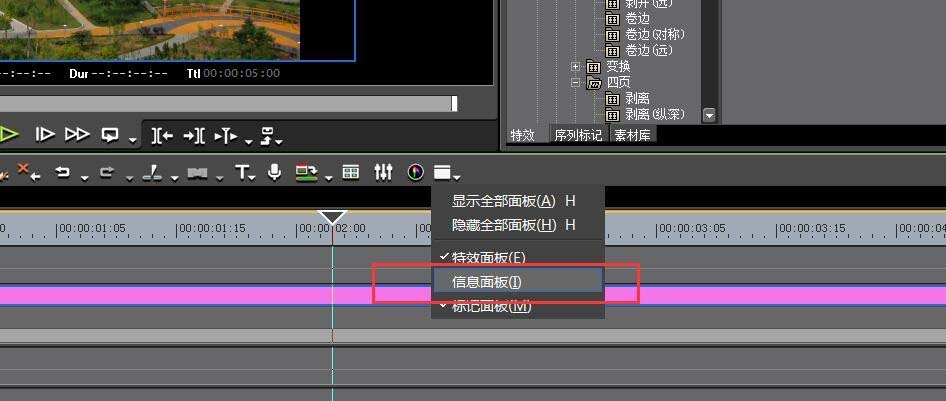
这时候在效果里面找到“单色”效果,先不要进行拖拽。

然后打开素材的“信息”面板,可以将单色拖拽到信息面板里面

也可以直接将单色直接拖拽到素材身上。

最后我们还可以点击信息面板中的单色,进行颜色的调整,以及添加关键帧动画。

相信你们看完上文讲解的EDIUS为视频去色的具体操作流程,应该都学会了吧!


")
")


语音转文字!新媒体翻译者都有哪些实时语音转文本工具?")


