


各位使用画图工具的用户们,知道如何制作桌面图标吗?此篇教程就为你们带来了画图工具制作桌面图标的详细操作步骤。

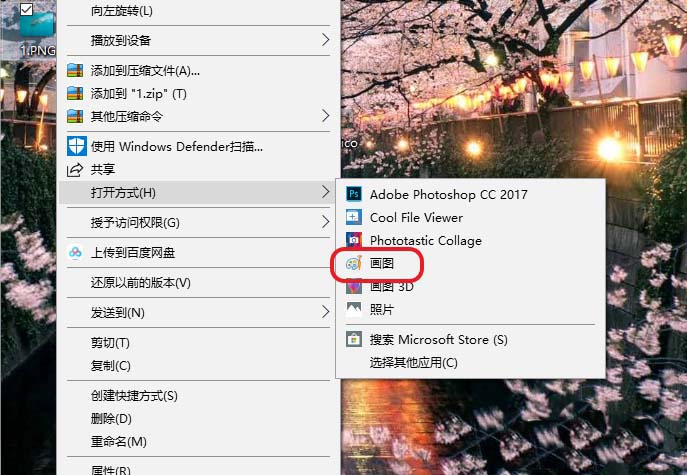
首先打开画图工具,我们右键单击用来做图标的图片。选择打开方式,使用电脑自带的画图打开。
然后我们点击画图上方工具栏的文件,鼠标移至另存为,选择BMP图片。
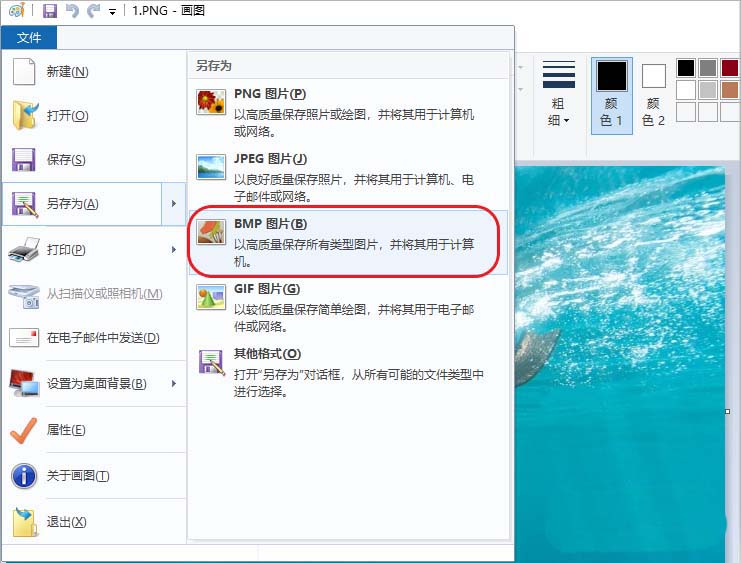
接着选择保存位置,最好是保存在桌面,方便我们寻找。
转换为BMP图片后,透明度会丢失,点确定。

这时关闭画图,在桌面上或者你之前保存的位置找到图片,右键单击,选择重命名。将.后面的bmp后缀改为ico。弹窗点击是。
然后我们找到你要修改的快捷方式图标,右键单击选择属性。在属性界面上,选择更改图标。

最后我们点击浏览,找到你桌面上或者你保存位置的图片,确定两次后,即可完成图标更改。

根据上文为你们讲解的画图工具制作桌面图标的详细操作步骤,你们应该都学会了吧!


")
")


语音转文字!新媒体翻译者都有哪些实时语音转文本工具?")


