

本期为你们带来的文章是关于Indesign软件的,你们晓得Indesign中排版杂志自动显示页码怎么操作的吗?下文就带来了Indesign排版杂志自动显示页码的详细操作流程。

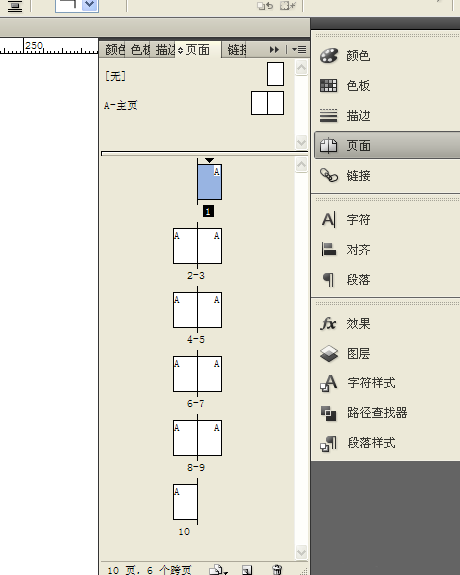
首先我们打开Indesign,新建一本杂志,比如这本杂志有10页,确定!

然后我们在页码标签里可以看到整本杂志的预览。
接着我们双击主页A,在主页A里编辑页码。
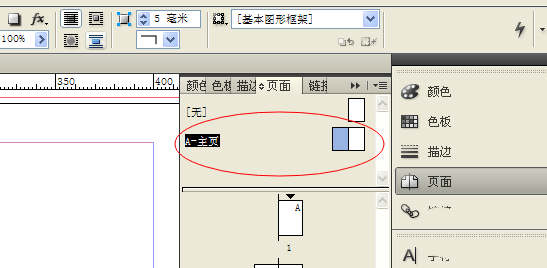
这里要注意,为什么是“第A页”这里面的“A”不是打出来的,而是在【文字】-【插入特殊字符】-【标志符号】-【当前页码】而得到的,这样设置后这里的“A”就是显示当前的页码了。

最后我们双击第4页看一下,左下角的页码已经自动变成了“第4页”

相信各位看完了上文讲解的Indesign排版杂志自动显示页码的详细操作流程,应该都学会了吧!


")
")


语音转文字!新媒体翻译者都有哪些实时语音转文本工具?")


