

电脑是我们生活中以及工作中常用的物品,小编使用的是win7系统,你们知道在win7系统中如何设置网络打印机吗?下文就带来了win7系统设置网络打印机的具体步骤。

1.首先打开电脑的任务管理器,找到设备和打印机选项。如图所示:

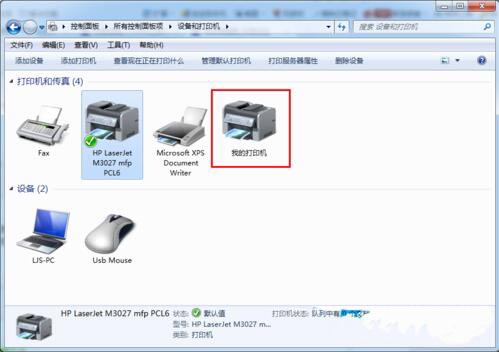
2.点击设备和打印机选项,进入设备和打印机界面。如图所示:

3.点击鼠标右键,弹出菜单选项,菜单选项里有添加打印机选项。如图所示:

4.点击添加打印机选项,弹出添加打印机窗口,有两个选项,一个是添加本地打印机,另一个是添加网络,无线或bluetooth打印机。在这里我们选择添加本地打印机。如图所示:

5.点击添加本地打印机选项,窗口跳转到选择打印机端口界如图所示:面,在这里选择创建新端口,端口类型选择standard TCP/IP port。如图所示:

6.点击下一步,进入键入打印机主机名或IP地址窗口,输入打印机的IP地址。如图所示:

7.点击下一步,进入检测TCP/IP端口界面。如图所示:

8.系统检测到TCP/IP端口设置无误后,自动跳转到安装打印机驱动程序界面。如图所示:

9.在安装打印机驱动程序界面里选择打印机的品牌及型号。如图所示:

10.点击下一步,跳转到键入打印机名称界面。如图所示:

11.点击下一步,进入打印机驱动安装界面。如图所示:

12.打印机驱动安装成功后,跳转到打印机共享界面,默认选择不共享这台计算机。如图所示:

13.点击下一步,显示你已成功添加打印机。如图所示:

14.此时可以选择下方的打印测试页,如果可以正常打印,证明打印机添加成功,点击完成即可。如图所示:

15.再次进入控制面板设备和打印机界面,即可看到已经添加的打印机。如图所示:
看完上文为你们讲解的win7系统设置网络打印机的具体步骤,你们也赶快去设置吧!


")
")


语音转文字!新媒体翻译者都有哪些实时语音转文本工具?")


