

一些伙伴们还不清楚win10系统关闭microsoft更新的操作过程,下面小编就分享win10系统关闭microsoft更新的教程 ,一起来看看吧。
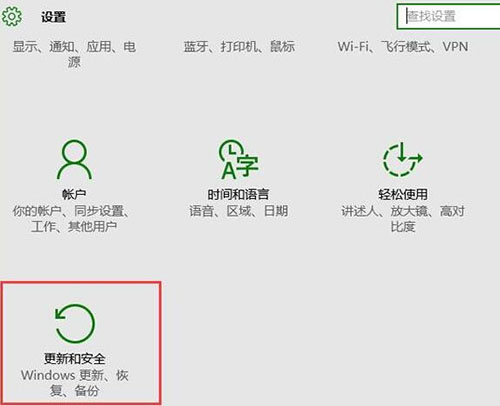
1、按win+i打开系统设置窗口,然后点击更新和安全选项,如图所示:
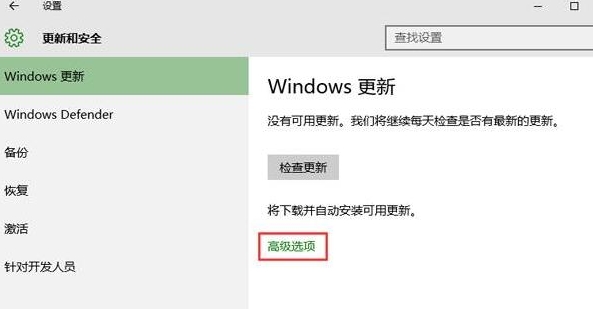
2、调出更新和安全的设置窗口后,我们点击windows更新下的高级选项,如图所示:
3、接着先取消勾选“更新windows时提供其他microsoft产品的更新”,再点击“选择如何提供更新”,如图所示:

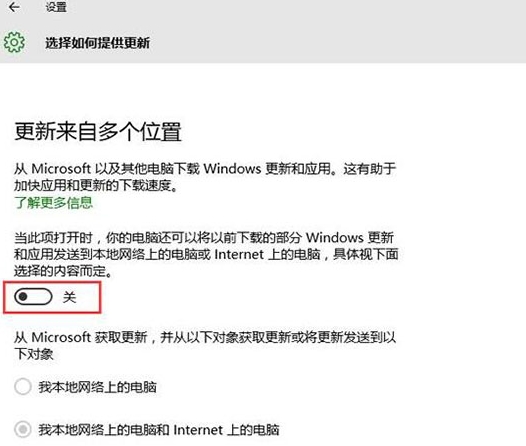
4、最后在选择如何提供更新窗口中,关闭其microsoft更新,如图所示:
上面就是小编带来的win10系统关闭microsoft更新的操作教程 ,大家都学会了吗?


")
")


语音转文字!新媒体翻译者都有哪些实时语音转文本工具?")


