


怎么在word文档中设置文字竖向?下面小编就给大家分享在word文档中设置文字竖向的步骤,一起来看看吧。
步骤如下:
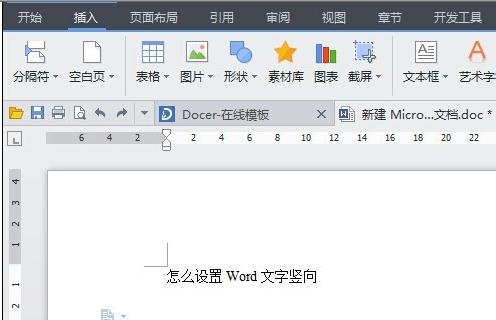
步骤一:如图,打开需要处理的Word文档
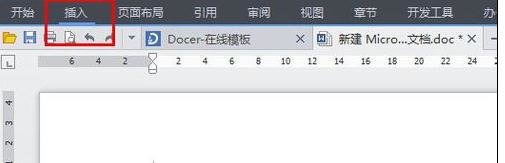
步骤二:如图,切换到插入菜单栏
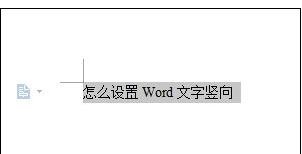
步骤三:如图,选中需要处理的文字部分
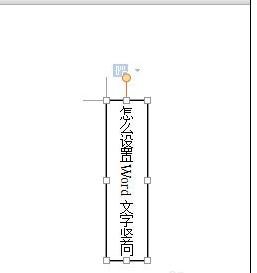
步骤四:如图,选择“文本框”里的“竖向文本框”

步骤五:如图,设置“竖向文本框”之后,文字就会变成竖向显示的了
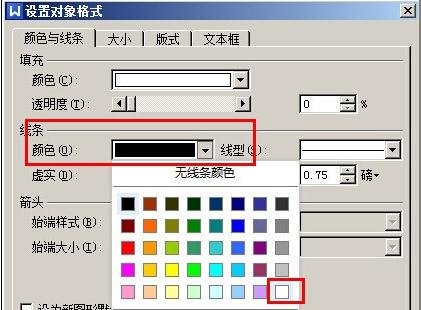
步骤六:如图,在文本框上右键单击,打开“设置对象格式”,然后将线条颜色设置的和背景颜色一样,这样在文档里就看不到边框了

以上就是怎么在word文档中设置文字竖向的全部内容了,大家都学会了吗?


")
")


语音转文字!新媒体翻译者都有哪些实时语音转文本工具?")


