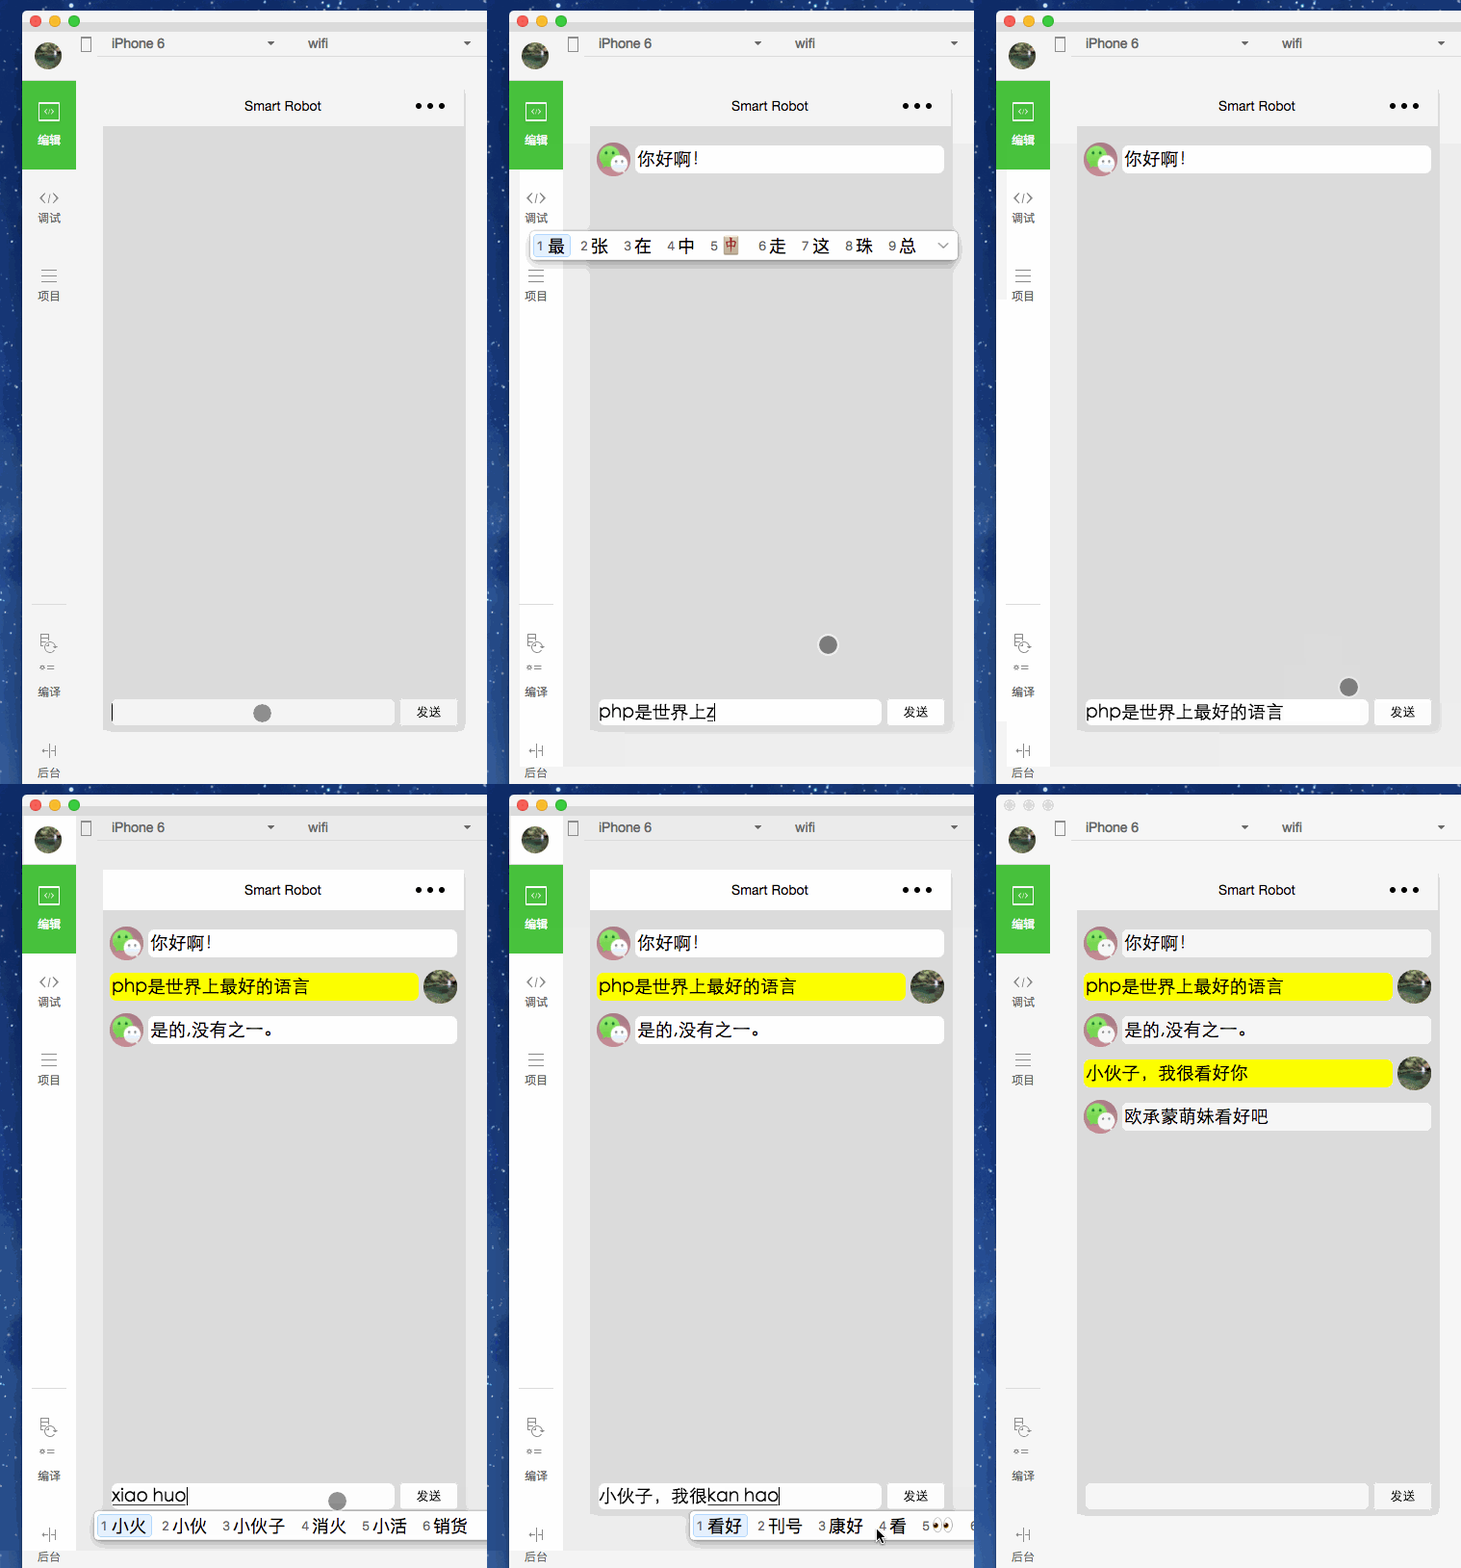
如何在微信小程序上制作智能机器人? 还不会操作的小伙伴,就跟着小编一起去了解具体的方法吧!
项目为智能应答机器人,使用了图灵机器人接口,慢慢调戏吧

首页,主要处理页:
//index.js
var app = getApp();
var that;
var chatListData = [];
Page({
data: {
askWord: \'\',
userInfo: {},
chatList: [],
},
onLoad: function () {
that = this;
//获取用户信息
app.getUserInfo(function (userInfo) {
that.setData({
userInfo: userInfo
});
});
},
onReady: function () {
//问候语
setTimeout(function () {
that.addChat(\'你好啊!\', \'l\');
}, 1000);
},
sendChat: function (e) {
let word = e.detail.value.ask_word ? e.detail.value.ask_word : e.detail.value;//支持两种提交方式that.addChat(word, \'r\');//请求api获取回答
app.req(\'post\', \'openapi/api\', {
\'data\': { \'info\': word, \'loc\': \'广州\', \'userid\': \'123\' },\'success\': function (resp) {that.addChat(resp.text, \'l\');
if (resp.url) {
that.addChat(resp.url, \'l\');
}
},
});
//清空输入框
that.setData({
askWord: \'\'
});
},
//新增聊天列表
addChat: function (word, orientation) {
let ch = { \'text\': word, \'time\': new Date().getTime(), \'orientation\': orientation };chatListData.push(ch);that.setData({
chatList: chatListData
});
}
})
页面:
//index.wxml
<view class="container">
<scroll-view class="scrool-view" scroll-y="true">
<view class="chat-list">
<block wx:for="{{chatList}}" wx:key="time">
<view class="chat-left" wx:if="{{item.orientation == \'l\'}}">
<image class="avatar-img" src="../../res/image/wechat-logo.png"></image>
<text>{{item.text}}</text>
</view>
<view class="chat-right" wx:if="{{item.orientation == \'r\'}}">
<text>{{item.text}}{{item.url}}</text>
<image class="avatar-img" src="{{userInfo.avatarUrl}}"></image>
</view>
</block>
</view>
</scroll-view>
<form bindsubmit="sendChat">
<view class="ask-input-word">
<input placeholder="" name="ask_word" type="text" bindconfirm="sendChat" value="{{askWord}}" />
<button formType="submit" size="mini">发送</button>
</view>
</form>
</view>
网络请求方法:
//app.js
req: function (method, url, arg) {
let domian = \'//www.tuling123.com/\', data = { \'key\': \'9d2ff29d44b54e55acadbf5643569584\' }, dataType = \'json\';//为方便广大群众,提供keylet header = { \'content-type\': \'application/x-www-form-urlencoded\' };if (arg.data) {data = Object.assign(data, arg.data);
}
if (arg.header) {
header = Object.assign(header, arg.header);}
if (arg.dataType) {
dataType = arg.dataType;
}
let request = {
method: method.toUpperCase(),
url: domian + url,
data: data,
dataType: dataType,
header: header,
success: function (resp) {
console.log(\'response content:\', resp.data);let data = resp.data;typeof arg.success == "function" && arg.success(data);},fail: function () {
wx.showToast({
title: \'请求失败,请稍后再试\',
icon: \'success\',
duration: 2000
});
typeof arg.fail == "function" && arg.fail();},complete: function () {
typeof arg.complete == "function" && arg.complete();}
};
wx.request(request);
}
以上就是如何在微信小程序上制作智能机器人的全部内容了,大家都学会了吗?
 天极下载
天极下载


