

这篇文章是教大家怎么使用微信小程序的表单基本功能?教程简单易学,有需要的小伙伴就赶紧和小编一起来学习一下吧。
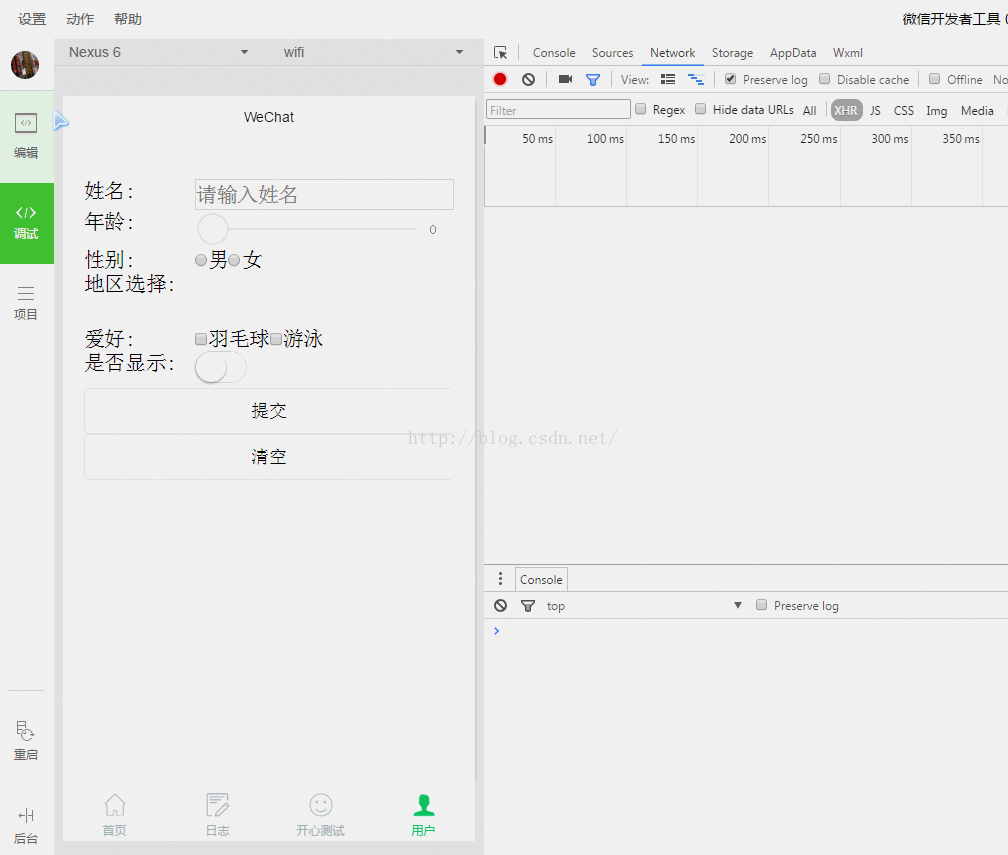
1. 表单页面
姓名:
年龄:
性别:
男
女
地区选择:
爱好:
羽毛球
游泳
是否显示:
提交
清空
{{notice_str}}
确认提交么?
提示
清空成功
2.js 代码
var app = getApp();
Page({
data:{
// text:"这是一个页面"
array:["中国","美国","巴西","日本"],
toast1Hidden:true,
modalHidden: true,
modalHidden2: true,
notice_str: \'\',
index:0
},
toast1Change:function(e){
this.setData({toast1Hidden:true});
},
//弹出确认框
modalTap: function(e) {
this.setData({
modalHidden: false
})
},
confirm_one: function(e) {
console.log(e);
this.setData({
modalHidden: true,
toast1Hidden:false,
notice_str: \'提交成功\'
});
},
cancel_one: function(e) {
console.log(e);
this.setData({
modalHidden: true,
toast1Hidden:false,
notice_str: \'取消成功\'
});
},
//弹出提示框
modalTap2: function(e) {
this.setData({
modalHidden2: false
})
},
modalChange2: function(e) {
this.setData({
modalHidden2: true
})
},
bindPickerChange: function(e) {
console.log(\'picker发送选择改变,携带值为\', e.detail.value)this.setData({
index: e.detail.value
})
},
onLoad:function(options){
// 页面初始化 options为页面跳转所带来的参数},
onReady:function(){
// 页面渲染完成
},
onShow:function(){
// 页面显示
},
onHide:function(){
// 页面隐藏
},
onUnload:function(){
// 页面关闭
},
formSubmit: function(e) {
var that = this;
var formData = e.detail.value;
wx.request({
url: \'//test.com:8080/test/socket.php?msg=2\',data: formData,
header: {
\'Content-Type\': \'application/json\'
},
success: function(res) {
console.log(res.data)
that.modalTap();
}
})
},
formReset: function() {
console.log(\'form发生了reset事件\');
this.modalTap2();
}
})
tabBar里面的pagePath跳转 wx.switchTab
pages里面的pages跳转 wx.redirectTo
3. 部分样式
#adduser{
background: #f5f5f5;
}
.section__title{
float: left;
width:30%;
}
.form-group{
float: right;
width: 70%;
}
.section{
clear: both;
width:90%;
margin: 2rem auto;
}
.input-text{
border: 1px solid #ddd;
}
.button{
border: 1px solid #1aad19;
border-radius: 2px;
}
.picker{
padding: 13px;
background-color: #FFFFFF;
}
4. 服务器端
var_dump($_REQUEST);
以上就是怎么使用微信小程序的表单基本功能的全部内容了,大家都学会了吗?,


")
")


语音转文字!新媒体翻译者都有哪些实时语音转文本工具?")


