

说到PPT软件,相信很多人工作中都在使用,不过你们描述晓得PPT中是怎么插入邮件图标的呢?下文就为你们带来了PPT插入邮件图标的具体步骤介绍。

首先打开PPT软件,在PPT制作页面,点击工具栏。

然后在工具栏中,点击插入的按钮。

接着在插入按钮页面,点击特殊符号按钮。

再点击特殊符号,进入特殊符号页面。

这时在特殊符号页面,点击wingdingS按钮。
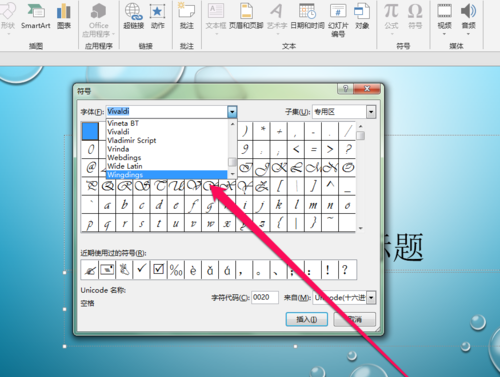
然后点击wingdings按钮,进入wingdings页面。

在wingdings页面中,找到邮件的图标。

这时候我们找到邮件的图标,点击插入按钮。

然后在PPT页面,看到邮件的图标。
根据上文讲解的PPT插入邮件图标的具体步骤介绍,你们是不是都学会了呀!


")
")


语音转文字!新媒体翻译者都有哪些实时语音转文本工具?")


