

chrome浏览器是一款很不错的浏览器,很多人都喜欢使用。今日,小编就为大家讲解chrome浏览器实行导入书签及设置的具体步骤。
首先需要一个html的文件的书签的文件,进行再电脑中找到该文件。

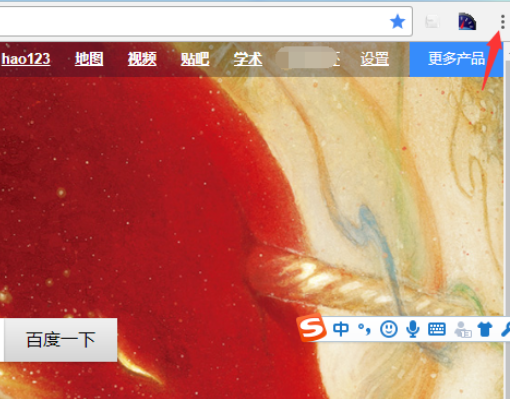
然后进行谷歌浏览器,进行右上角的位置当中的设置的选项。
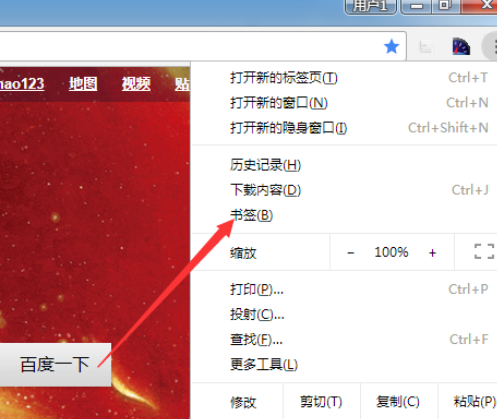
弹出了下拉菜单中进行选择为书签的菜单。
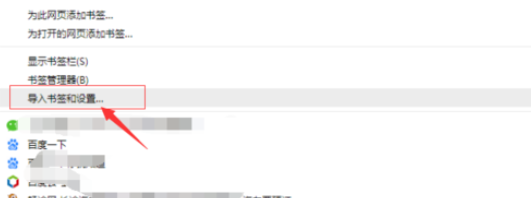
弹出了下一菜单中,进行选择为导入书签和设置的选项。
选中要导入的浏览器的类型的,进行点击导入。

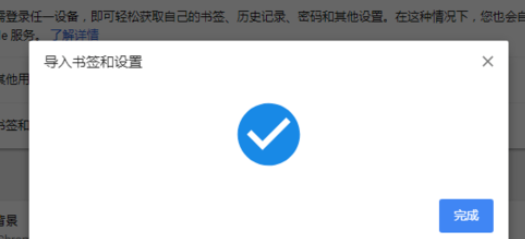
点击导入之后,会提示导入成功了。然后在书签查看是否导入成功了。
以上就是小编为大家讲解的chrome浏览器实行导入书签及设置的具体步骤,你们都学会了吗?


")
")


语音转文字!新媒体翻译者都有哪些实时语音转文本工具?")


