

许多小伙伴还不会photoshop设置虚线的操作,而下面就分享了photoshop设置虚线的操作方法,希望感兴趣的朋友都来共同学习哦
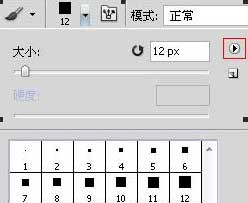
我们可以通过定义笔刷,画出常见的虚线。首先打开photoshop,新建文档,背景白色。选择画笔工具,调出需要的笔刷。点击红框内的箭头,从弹出菜单中选择方头画笔。
下面3个虚线效果:

画笔设置如下:


如果想密一些,缩小间距就可以了;如果想厚一些,加大圆度就可以了。
以上这里为各位分享了photoshop设置虚线的操作步骤。有需要的朋友赶快来看看本篇文章吧。


")
")


语音转文字!新媒体翻译者都有哪些实时语音转文本工具?")


