随着网络的发展,邮箱成为我们必备的软件,小编今日带来的内容是与qq邮箱有关,下文就是在qq邮箱中进行设置已读回执的详细步骤。
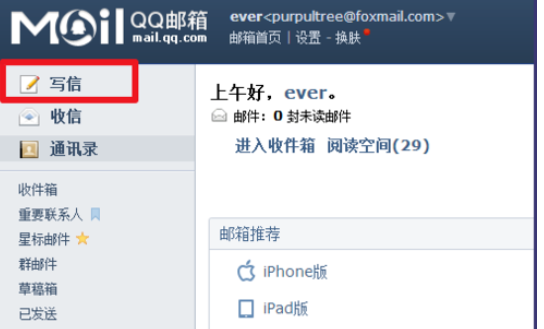
首先登录QQ邮箱,点击【写信】
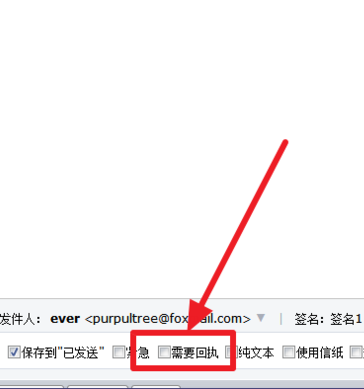
编写好邮件的内容后,点击下方的【其他选项】
勾选【需要回执】
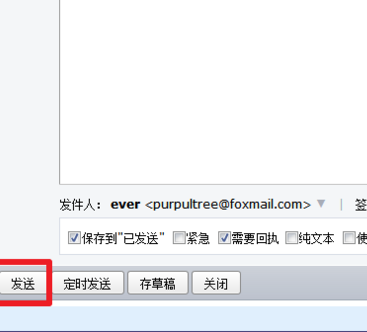
然后点击【发送】,将邮件发送到收件人的邮箱
这时候收件人,打开邮件就会在邮件内容的下方,出现如下的对话框,点击发送

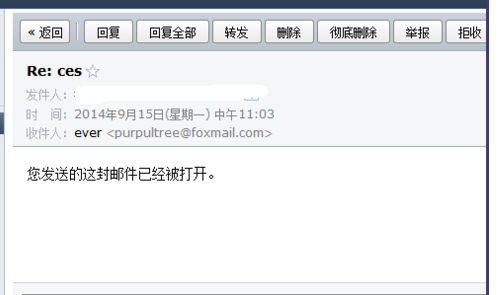
你就会收到如下的邮件

你就可以确认对方已经收到邮件,当然如果对方点击【不发送】,是无法知道对方是否已经阅读邮件了
上文就是在qq邮箱中进行设置已读回执的详细步骤,大家都学会了吗?


")
")


语音转文字!新媒体翻译者都有哪些实时语音转文本工具?")